Production Overview and Reference

The information contained here is solely intended for Tower Publications and is not to be republished, shared, re-used or otherwise disseminated to any one in any format without the express written consent of Charlie Delatorre, Owner of Tower Publications, Inc.

— ADS —

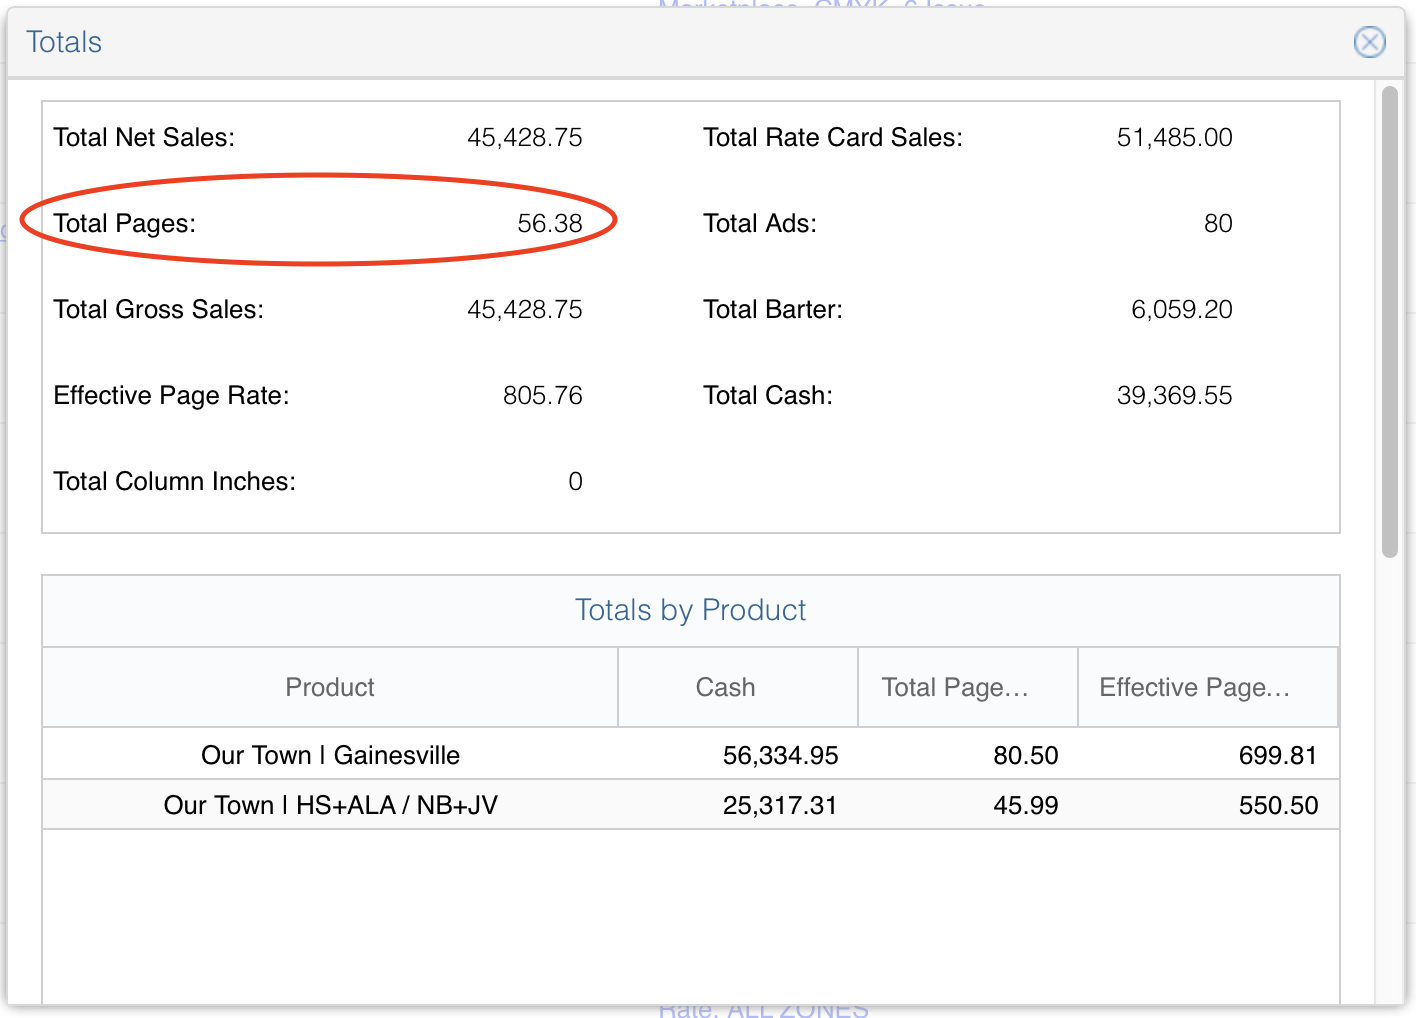
Magazine Manager (CRM)

Magazine Manager will be your primary interface to generate reports to know which ads are booked to run in a particular issue — including information on their: type, size, section, etc.

You’ll access this search from Reports > Production > Tower Ad Manager.

The report will ask you for qualifiers to limit your search. You can filter these options to your desired search as well as sort the results in any way that’s helpful.

From this list, which we refer to as a manifest, you’ll be able to select individual ads to access the Job Jacket, which will contain all the information about the ad. Details on Size, Ad Position, Section, etc.

Status on when it arrived as well as check boxes to mark when a proof(s) is completed.

After any action is taken in the “Status” section, an Order Number will be assigned that displays in the top right corner. This number is crucial to naming the InDesign file for that ad.

The Production area is only used for reps to indicate a specific Pick-Up if it is from an issue older than the very last publication.

Screen Shot 2020-03-26 at 3.25.03 PM.png

Naming Convention for Ads

All ads must follow a specific naming convention in order to have the proofing and publishing processes work properly.

AccountName-ProductCode_OrderNumber

For example, the ad in the example above would be named: AllAboutWomen-OTGV_688-2.indd

The account name can be anything you want, is not case sensitive and can include a hyphen if needed.

The most important part is the final hyphen must be followed by the Product Code, which is then followed by an underscore and finally the Order Number.

PRODUCT CODES:

OTGV = Our Town (All Zones and Gainesville Only)

OTHS = Our Town (High Springs/Alachua and Newberry/Jonesville)

ST = Senior Times

SG = Survival Guide


Ad Materials and Types

The sales rep who sold the ad should facilitate the designer with all copy. The components necessary to create an advertisement will come from a variety of sources. The main three will be either email, hand-written or simply typed instructions in the Ad Notes or Production Notes sections of the Job Jacket in Magazine Manager.

The different types of ads are:

PU = Pick Up
This means the ad will be running exactly as it has before with no changes.

PCHG = Pick Up with Changes
This means the ad will starting from a previous ad, but making revisions.

NEW = New Ad
This means the ad will be an entirely new design.

AGEN = Agency
This means the ad will be sent in ready-to-print.

AGPU = Agency Pick Up
This means the ad to run is a Pick Up from a previous Agency ad.

PEND = Pending
This means the rep does not know yet.


Adbase and Filing Structure

All the ads get stored in a folder named Adbase. Within that folder are alphabetical folders to organize client folders. Each client folder needs two nested folders named Art and Ads.

Any images, logos, etc. should be saved in the Art folder for that client. The Ads folder is meant to save previous ads. The only ad that should be in the root directory of the client folder should be the current ad.

Screen Shot 2020-03-27 at 8.06.34 AM.png

Templates

There are prepared templates for ads (all sizes) as well as robust templates for each product that include multiple master pages, paragraph and character styles. The templates are located in the Tower Publications Dropbox:

Production > Shared > CC Templates


Proofing & Processing Approved Ads

When the correct naming convention is used, any InDesign file in the Adbase will automatically generate a PDF proof in the Proofing section of Dropbox that corresponds with the Product Code in the file name. This is made possible by a small javascript file that must be kept in the InDesign application’s “Startup Scripts” folder on your local HD. You must also have the PDF preset “slug-proof” installed.

As you work on any ad, every time you save a new proof will be generated. Multiple saves will simply overwrite the existing proof (as long as the file name is identical).

When a sales rep approves an ad, they will drop it into the “(APPROVED)” folder within that products Proofing folder.

Process an Approved Ad

  1. Open the InDesign file and the Job Jacket in Magazine Manager. Double-check all the specifics are correct (Order Number, Size, Shape, Product, etc).

  2. Open the Preflight panel in InDesign. Run the Tower Preflight preset and correct any errors that might show up. Typically, this will be images or art with RGB or Spot colors. It also checks for resolution fidelity and overset text.

  3. Once Preflight has been passed, export a PDF using the Adobe PDF (Print) format.

  4. Save to: Production > Issues > Ads Approved

  5. Select the PDF preset for TOWER-SWOP2(new) and make sure the bleeds are set to match the document settings.

  6. Drop the proof into the “~COMPLETED” folder.

  7. Tick the box in the Job Jacket labeled “Ad Done”

TIP: After you export, you may be asked to Save upon closing the file. Always Save. This will create a saved path in the InDesign document to export to that folder again the next time you export. However, it will also make a new proof in the Proofing folder. Just drop it into Approved and overwrite the existing proof.


Art, Images, Logos & Text

All art should be set for final output:

  • CMYK

  • Raster images at 240dpi or above (minimum of 150)

  • No text smaller than 5pt

Stock photos/illustrations may be needed from time to time. We have an account with iStock with credits (although we make an effort to avoid unless absolutely necessary).

We use Suitcase to manage our Font Library.

Any new fonts added to the local library on your computer should also be copied into:

Production > Shared > SHARED FONTS

This helps ensure that another designer also has access to any fonts that you used.


Batch File Renaming

We use software called “A Better Finder Rename” to batch rename files. This is used rarely, but is critical for processing finalized ads for placement into InDesign with the Fido extension. There’s a pre-scripted droplet that will strip the filename of all the approved PDF or EPS files leaving only the Order Number as the name of the file.


— EDITORIAL —

Calendar

The calendar is created by pulling information from a variety of sources and then collected in a plain text file with proper formatting. I usually keep a running TXT document for the year and pull what I need based on the issue time frame.

Keep events in the text file in date order. Recurring events are kept in order at the end of the document.

CRITERIA:

Submissions will be published based on space available in the magazine. Recurring monthly/bi-monthly events must be free & open to the public. Paid events must be open to the public. Unique events that occur regularly such as classes, seminars and networking events will be published at our discretion. Religious organizations may post events only if the event promotes the arts, or is a fundraiser where 100% of the proceeds go to another, non-religious, non-profit organization. Events that are political in nature may not be approved.

SOURCES:

FORMAT:

TITLE
Day, Month Date and Time
Location, Address
CITY * Brief Description (around 50 words). Contact phone number, email or website.

**Here’s an example**

WINDSOR ZUCCHINI FESTIVAL
Saturday, May 14 from 9:00am – 4:00pm
Windsor Volunteer Fire Department Grounds, 1401 SE County Rd. 234
GAINESVILLE * Over 100 arts and crafts vendors from all around the state, Old Tyme Auction and a bake sale with zucchini bread and fried zucchini, zucchini cornbread and zucchini ice cream. Free to the public. Contact 352-123-4567 or info@example.com for more information.

FLOW INTO INDESIGN:

  1. Copy all relevant events from your master text file and paste into InDesign Calendar template

  2. Find/Replace and choose “Remove Trailing White Space” from the Query list

  3. Find/Replace and choose “Replace asterisk (end nest)” from the Query list

  4. From the Paragraph Styles right-click “CAL event” and select Apply “CAL event, clear overrides”


Theatre

Theatre events will be provided by the Editor and appear separately from the Calendar (and only in Senior Times). You can just match the styles from the last issue.


Classifieds

Classifieds will be provided by Annie and Pam and appear separately also (and only in Senior Times). There are paragraph styles in the Senior Times Calendar InDesign file for headers and listings.


InCopy

All the stories, articles and columns in our publications will be provided to Production as InCopy files. Any new text that is created on pages that Editorial needs access to will need to be added through the Editorial Assignments palette in InDesign as new assignments and saved into an appropriate folder within that issue’s editorial folder.

More instruction on this to come in the Pagination section.


— LAYOUT —

Issue Templates

There are InDesign templates for each magazine. These include customized master pages, layers, folios, paragraph styles, character styles, etc. These are located in: Production > Shared > CC Templates


Template Prep and Ad Import

Now that you have your page count estimate and advertising flat plan files from AdForce, open the magazine template (OT-TEMPLATE.indt).

TEMPLATE PREP

  1. Go to: Layout > Pages > Insert Pages…

  2. Add the amount you need using the “A-Master” setting

  3. Save the file into the issue folder with this naming convention:
    PRODUCT-ISSUE#FULL (e.g. OT-JANFEB2020#FULL)

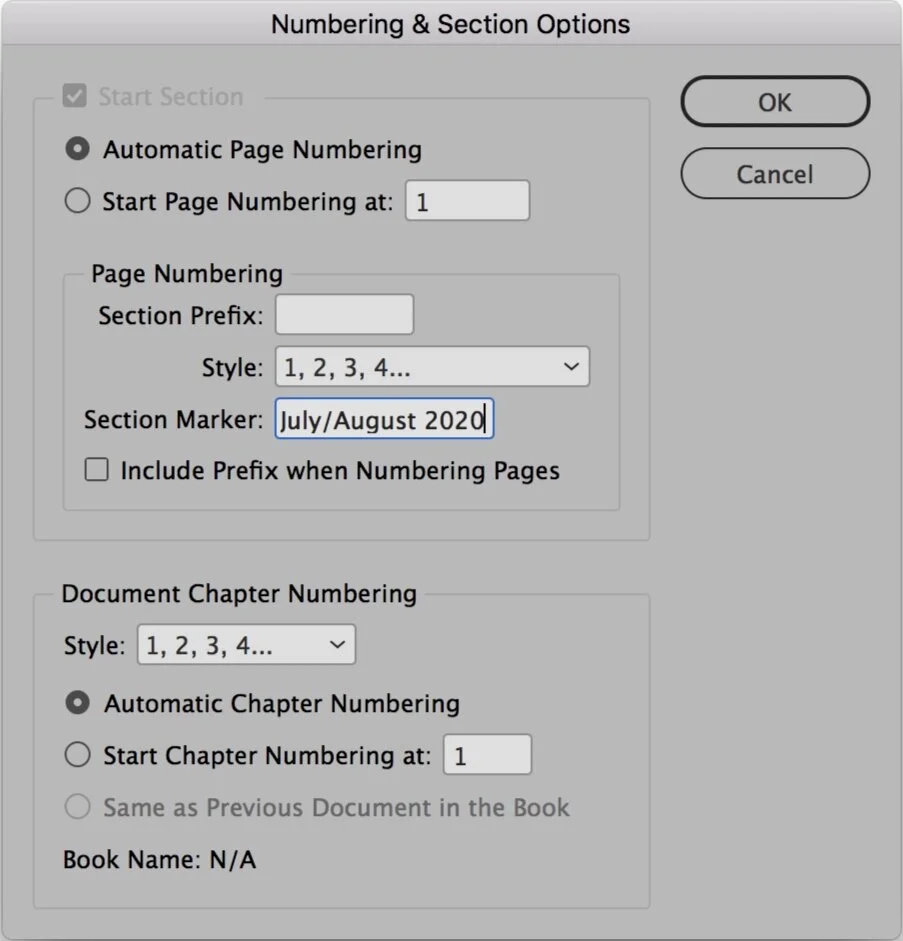
  4. In the Pages palette, right-click page 1 and choose Numbering & Section Options

  5. Set the issue date in the Section Marker field and click OK

Screen+Shot+2020-04-03+at+11.19.04+AM.jpg
 

IMPORT ADFORCE LAYOUTS

Importing your AdForce layouts is as easy as opening a new file in InDesign. After each ad layout imports, you will need to do a few clean-up tasks in your Layers palette to get everything situated.

With your blank template open in InDesign…

  1. Select File > Open…

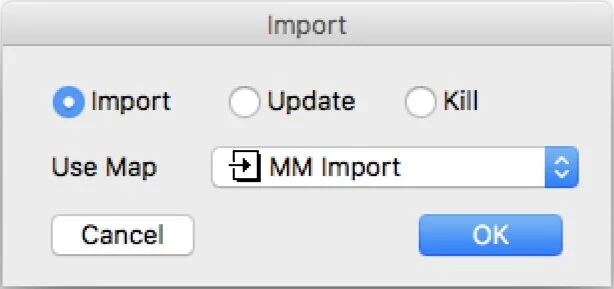
  2. Choose one of the four AdForce files you made (one for each zone)

  3. Select “Overlay” from the MEI Ad Import dialog box

  4. Make sure the options are set to: Overlay All Pages, Start Overlay on Page 1, Master is “A-Master”, Magazine Manager and Base Edition are selected

  5. After the import completes, select the layer for the correct zone and command-click to also select the new layer named “Infobox” (make sure the little pen icon is NOT on the Infobox layer)

  6. Right-click on the layer and choose “Merge Layers”

  7. Right-click on the Page Label layer and choose Delete Layer (do not delete after the last import, we’re just avoiding duplicates)

  8. Repeat steps until all four AdForce files are imported

  9. After the last AdForce file is imported and merged, right click the Page Label layer and select “Layer Options”

  10. Turn ON the option to Lock Layer and turn OFF the option for Print Layer

After all the ad boxes are imported, you can move them around to suit the layout as needed.


Flowing Editorial

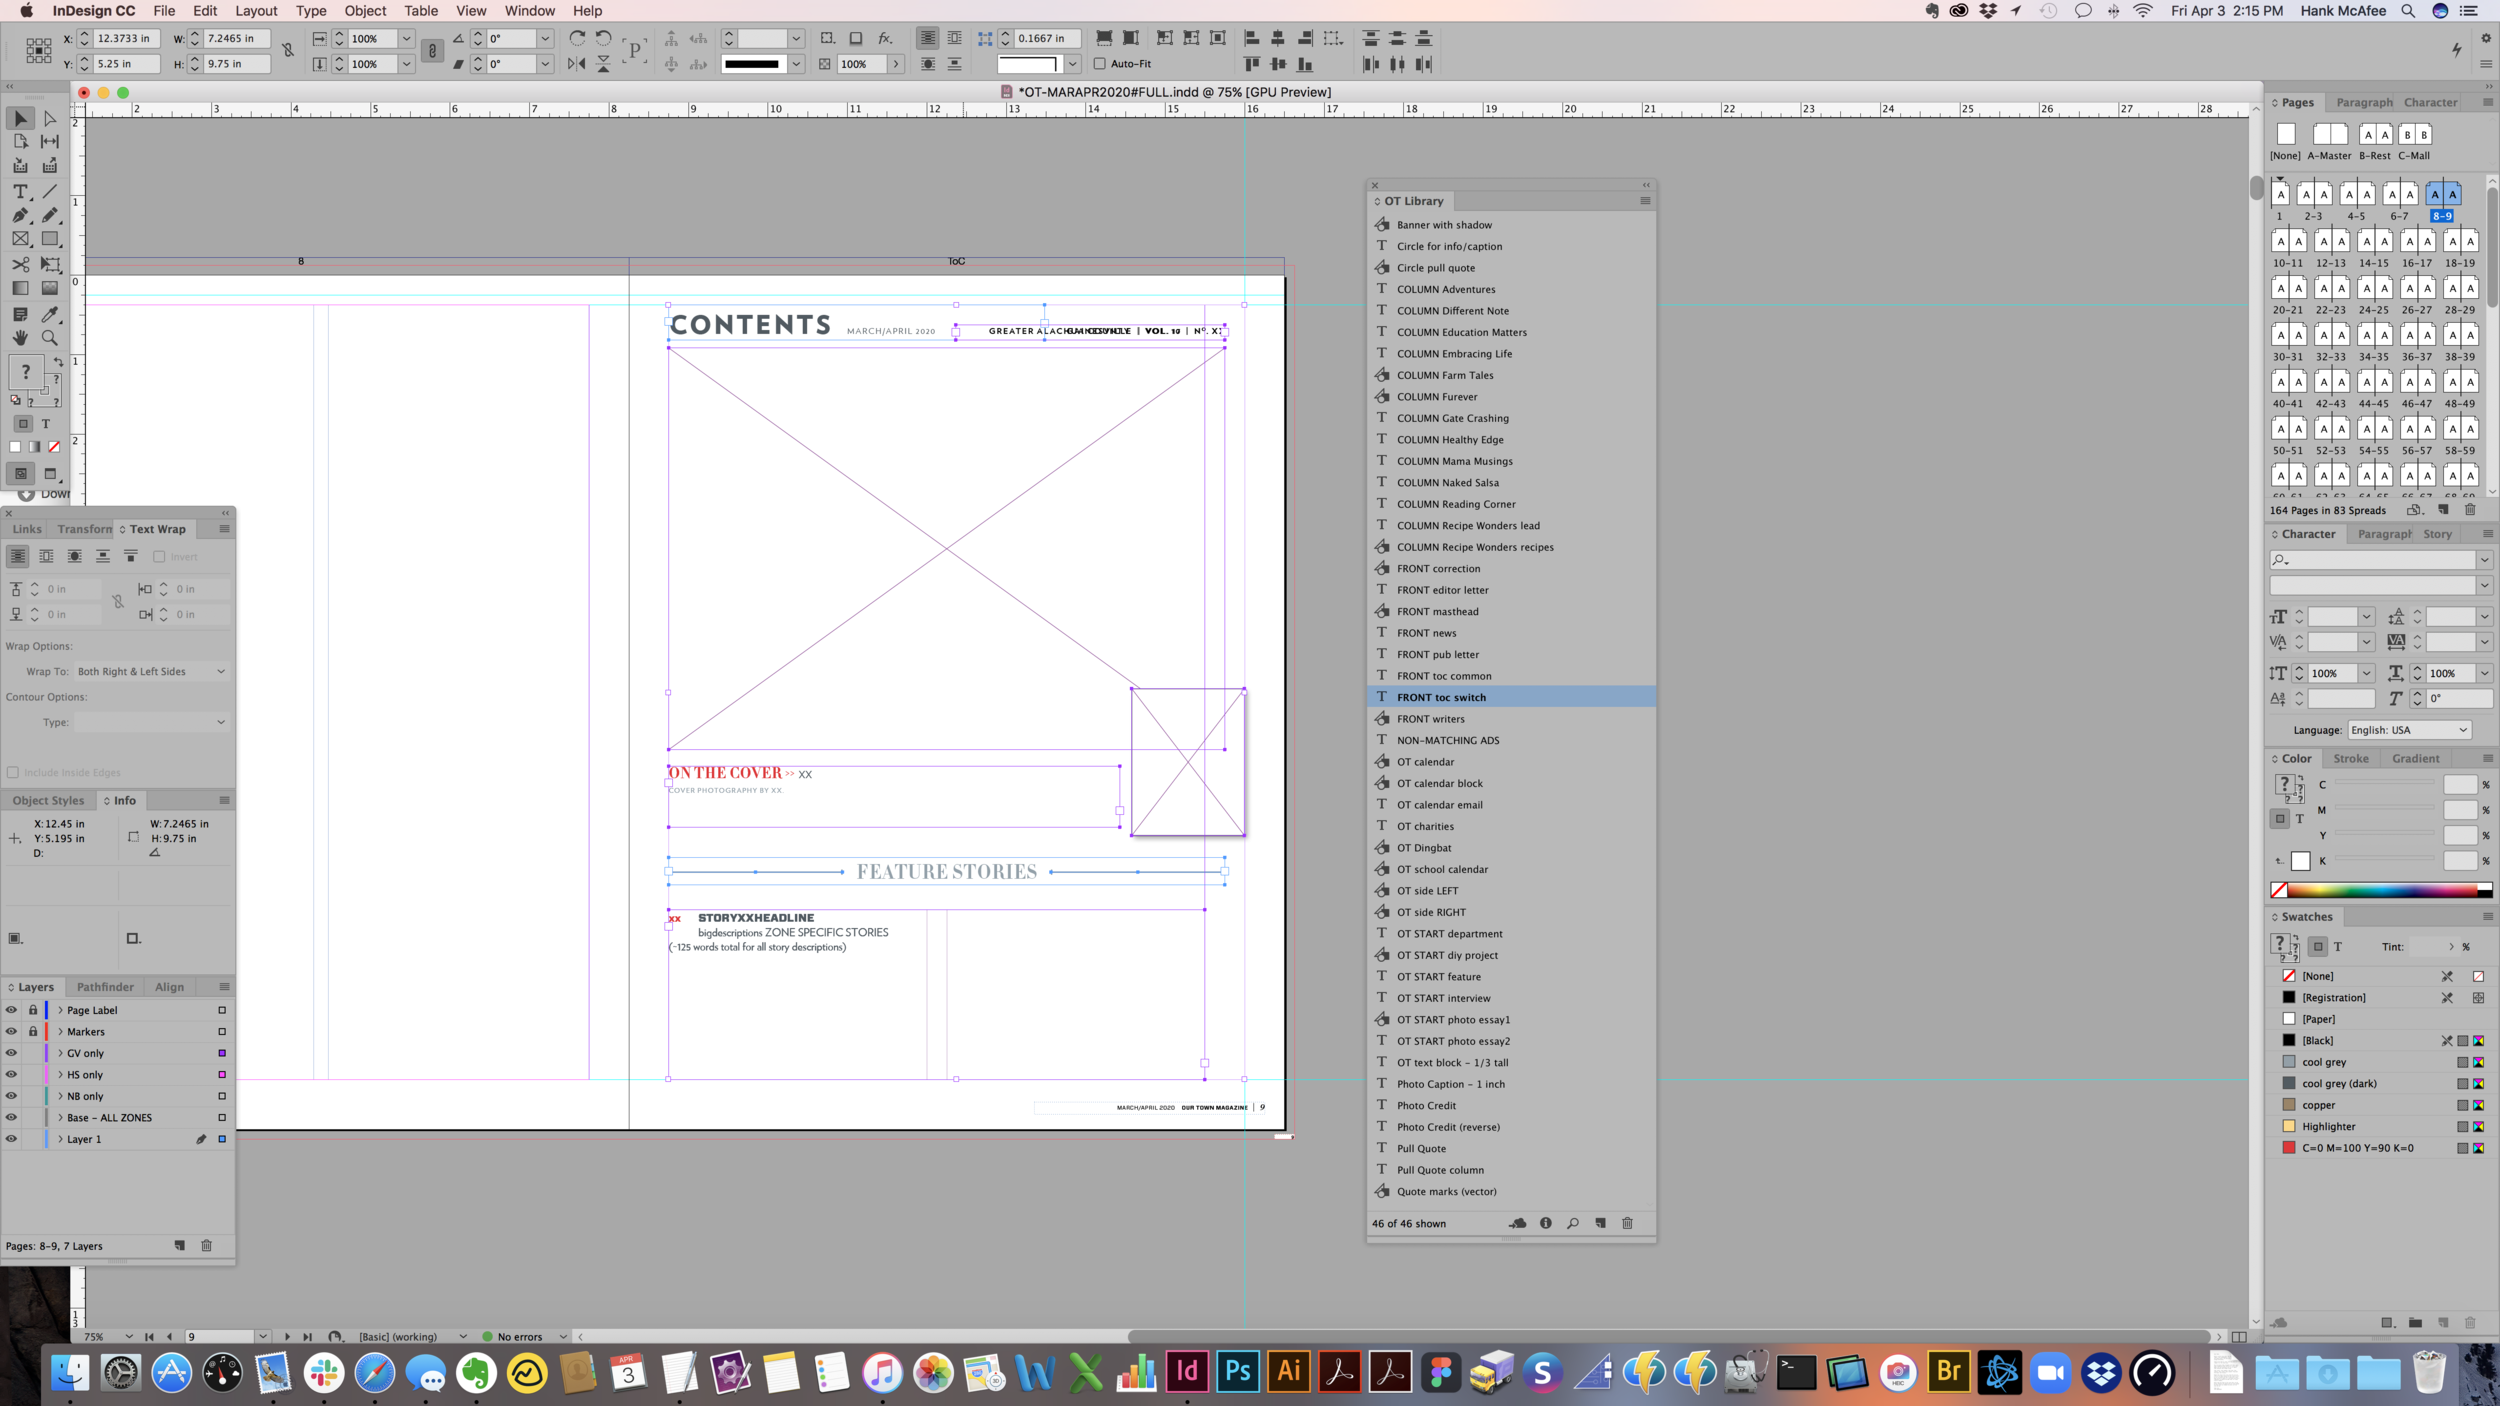
Now that the ad boxes are imported, you should get your editorial content roughed in to the magazine. Start by opening the InDesign Library file located in your templates folder. Production > Shared > CC Templates > “Magazine”

The one for Our Town is named “OT Library.indl” and you can drag pre-made sections onto the page(s) from the Library palette.

There are beginning design parts for most everything that repeats in each issue like Table of Contents, Editor’s Note, Writer Bio page. There’s also starting blanks for all regular Columnists, Feature Articles, Department Articles and more.

NOTE:
Typically, feature-style articles and department-style articles will be your choice. This is how I decide…
Feature = Lots of good photos/art or a long story (more than 1000 words)
Department = Not many good photos/art or a shorter story (less than 1000 words)

ROUGH FLOW EDITORIAL

IMPORTANT: Stay aware of which pages/signatures are set to be switch plates on the press. This is where you’ll be able to run GV only and HS only stories on different layers of the same pages.

As a general rule of thumb, editorial content should begin on left-hand pages.

Always make sure to leave adequate room for additional photos/art.

  1. To start a feature, department or column, begin by dragging “OT START Feature” (or other) from the OT Library and placing on the page

  2. Select the main body copy block and and select File > Place and navigate to the InCopy file for that story from the editorial folder (you can also drag-and-drop from the Finder into your InDesign file)

  3. Right-click on the text frame and choose InCopy > Check Out

  4. Select and Cut the Title

  5. Paste without Formatting into the placeholder above (this preserves the text style in the placeholder)

  6. Repeat for Headline, Subhead and Writer byline

  7. Clean up extra returns in the body copy and Select All

  8. Apply the “Body” paragraph style

  9. Select the first paragraph and apply the “Body - Drop Cap” paragraph style

  10. Add photos/art (just to the opening page or spread for now)

  11. Add blank text block(s) for photo captions if needed and provide a word count estimate

  12. Use color(s) from the photos/art to adjust the placeholder text color to harmonize

  13. Open the Windows > Editorial > Assignments palette

  14. Turn down the carats to show “Unassigned InCopy Content”

  15. Select the text blocks for everything except the main story and drag them to that section of the palette

  16. In the dialog that pops up, name them something sensible and place in a new folder named “~InCopy Links ISSUEDATES” (i.e. ~InCopy Links MARAPR20)

  17. Click the text linking box in the body copy text block (red plus)

  18. Go to the next page and click inside the placeholder text box (repeat as needed)

NOTE:
If you are adding multiple text blocks at once into the Editorial Assignments, InDesign will kind of half-ass auto name them with whatever you typed as a prefix.


Split Up Issue Documents

After the ads, editorial, calendar, etc. are all roughed in, I recommend splitting the document up into smaller sections. Typically there will be 3-5 and I try to split them at signature breaks so output for press is simpler later on.

For example… if the first signature of 32 pages also has switch pages for GV & HS, that’s a good place to split.

  • Determine the pages where you want to split things up (stories must remain intact)

  • Make a safety copy of the main “FULL” document

  • Duplicate the “FULL” document for your amount of splits

  • Rename them A, B, C, D, etc.

  • Open each, delete the appropriate pages and save

For all except A, you’ll need to start your numbering at the correct page. Do this from the Pages palette.

Right-click the first page in the document and select “Numbering & Section Options”. Then set the “Start Page Numbering at:” to the correct page number.

TIP: We use absolute page numbering, which means the cover counts as Page 1. So, the end of the first 32 page signature is really page 34.

Screen Shot 2020-04-07 at 11.26.35 AM.png

Linking Ads with Fido

The ad boxes created by AdImport can have their contents managed by the Fido extension. In order for Fido to see the files you want, we have to rename the approved PDF (or EPS) files. Any file linked using Fido must be named ONLY the Order Number (Ad #) assigned by Magazine Manager and included at the end of each ad’s file name.

AFTER ALL ADS ARE APPROVED & PROCESSED

Once all the approved ads have been processed into final PDF or EPS files and renamed, you can link them into your InDesign document(s) for that issue.

In the Ads Approved folder where these files have been saved (Production > Issues > Ads Approved), you’ll want to select all the files with full file names and drag them to the “Topless Stripper” droplet created from A Better Finder Rename. I recommend keeping this droplet in your Dock.

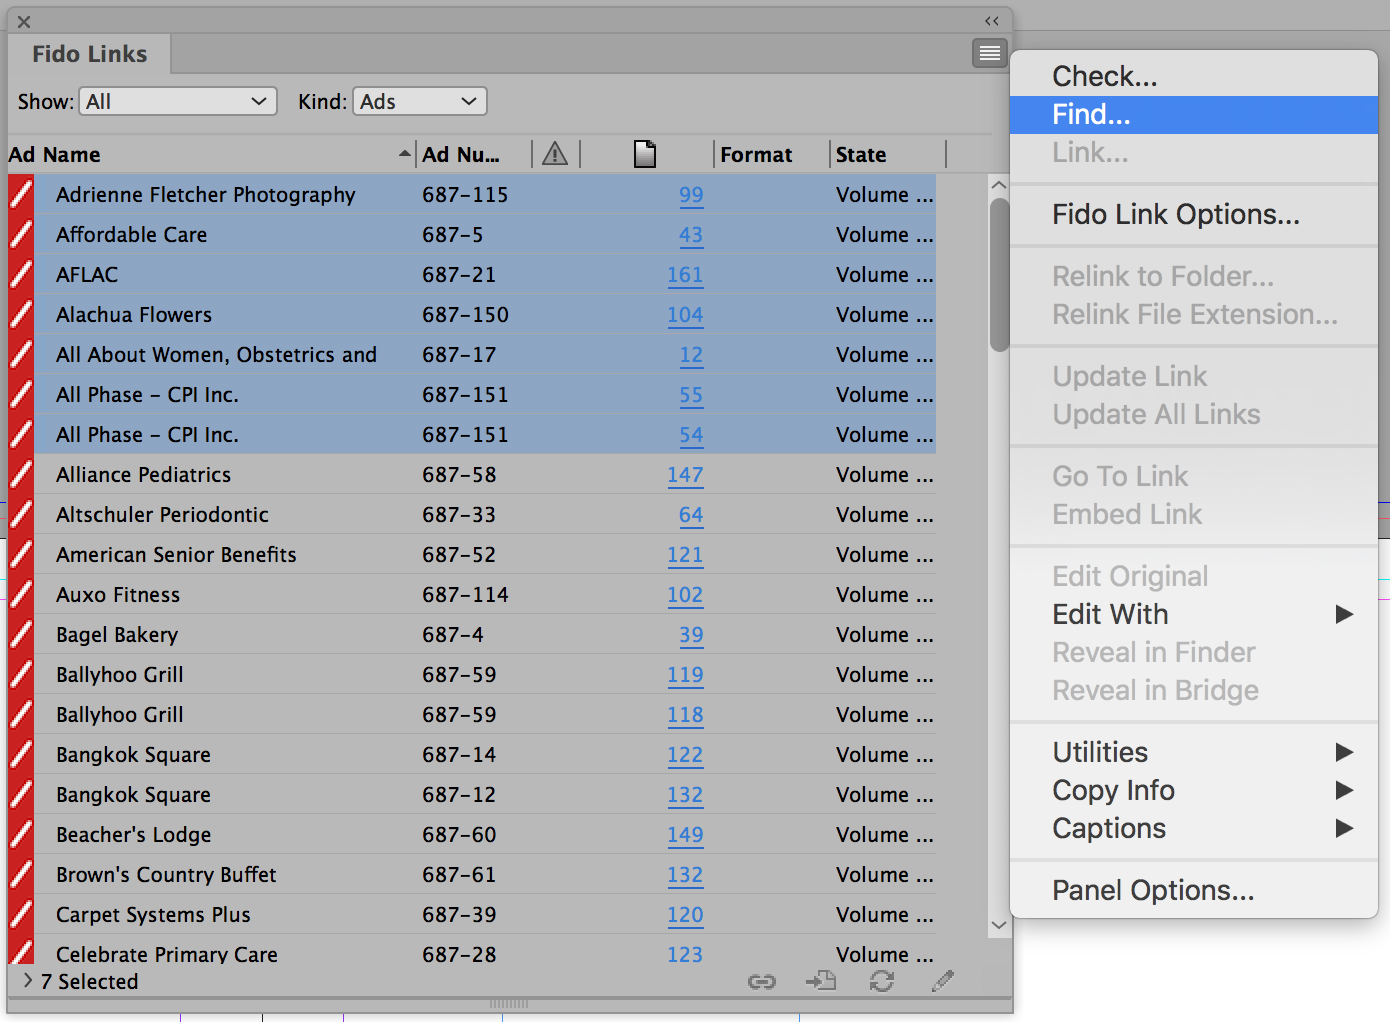
LINKING ADS

  • In InDesign, go to: Window > Fido Links

  • In the Fido Links palette, set it to “Show: All” and “Kind: Ads”

  • Select the ad(s) that you want to link

  • Click the menu button on the top right and select “Find…”

  • Navigate to the Ads Approved folder

NOTE: Be patient. It might take 3-10 minutes if you are finding dozens of ads.

Screen Shot 2020-04-07 at 10.16.38 AM.png

— PRESS —

Page Export

IMPORTANT: Editorial must check in all InCopy files, all ads must be placed on the pages and checked against the manifest.

EXPORT PAGES

Open the Scripts palette from: Window > Utilities > Scripts

  1. Make sure the correct layers you want to export are on/off

  2. In the “User” folder, Double-click on Page Exporter

  3. The “Base Name” must have the letter (A, B, C, etc) removed

  4. Check remaining settings, page range, etc. and click OK

  5. Use the “TOWER-SWOP2(new)” PDF preset

  6. Save to the “PDFs” folder within your issue folder

If the pages are switch zones, you must amend the base name to include which one by adding information before the hashtag “-ZONE-SWITCH” (i.e. OT-MARAPR2020-OTGV-SWITCH#)

The exported PDFs will have their respective page number added to the file name after the hashtag.

Pages can be sequenced individually or as running groups. (23,65,70-84)

Pages can be sequenced individually or as running groups. (23,65,70-84)


Front Cover & Spine

Screen Shot 2020-04-07 at 12.50.58 PM.png

These files will be exported using the same script as the other pages, but will be sent directly to the press via FTP.

The Gainesville edition has two versions that need to be exported – one with a mail label and one without. Just make sure the correct layer(s) are on/off before exporting.

UPLOAD TO FTP

  • Open Transmit

  • Double-click the Favorite for NPC Printing

  • Drag and drop the files you want to upload

Screen Shot 2020-04-07 at 12.56.12 PM.png

Upload Files to Printer

Before uploading PDF files, open them all and visually inspect them for any errors pre-flight may have missed. (e.g. missing folios, full bleed ads not set properly, etc.)

More instructions on this later. I can’t screenshot anything right now because there’s no active job in the queue.


— WEBSITE —

Detail 1

Vivamus sit amet semper lacus, in mollis libero. Nulla eu pretium massa. Sed a ligula quis sapien lacinia egestas. Aliquam bibendum, turpis eu mattis iaculis, ex lorem mollis sem, ut sollicitudin risus orci quis tellus. Donec ac fringilla turpis.


Detail 2

Aliquam bibendum, turpis eu mattis iaculis, ex lorem mollis sem, ut sollicitudin risus orci quis tellus. Nulla lectus ante, consequat et ex eget, feugiat tincidunt metus. Donec eu est non lacus lacinia semper. Donec eu est non lacus lacinia semper. Aliquam bibendum, turpis eu mattis iaculis, ex lorem mollis sem, ut sollicitudin risus orci quis tellus.


Detail 3

Sed a ligula quis sapien lacinia egestas. In sit amet felis malesuada, feugiat purus eget, varius mi. Mauris id fermentum nulla. Mauris id fermentum nulla.